Clipping operations restrict graphics operations to a specific part of the page. It is used to prevent graphics from spilling outside of pre-set bounds, or for special effects such as custom patterns.
To clip graphics, use the SetClip method. All graphics from that moment on will be truncated to fit the specified clipping bounds.
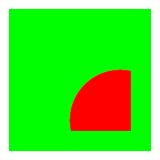
In the example above, an ellipse is filled. It does not entirely fit inside the clipping bounds, so it is truncated. The rectangle behind the ellipse is not affected by the painting of the ellipse, except for the part within the clipping bounds.
Calling SetClip() a number of times results in a clip mask that is the intersection of the individual masks. That means multiple clip masks limit the clip area. To create a clip mask with multiple shapes, use a GraphicsPath instance (see the section on Clip masks below). The PDF standard does not allow an existing clip mask to be extended.
To remove the clipping mask at a later stage, the graphics state needs to be stored before the mask is applied, and then restored when the mask is no longer required. Below is a modification of the previous code:
This time, the graphics state is preserved before the clip mask is applied. The ellipse is painted as before, and truncated. Then, the original graphics state is restored and the ellipse is outlined in blue. Because the clip mask no longer applies, the entire ellipse is outlined.
Note: The clip mask is automatically removed when a new page is opened.
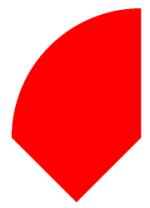
In the examples above, the clip masks were based on rectangles. A clip mask can consist of a number of shapes, however. To create more detailed clip masks, specify an instance of GraphicsPath when constructing eac mask. In the following example, a clip mask is created and a large circle is truncated by the mask.
Clips masks can be created with rectangles, paths (as in the example above), or text.
A common use for clip masks is special effects. See the two examples below:
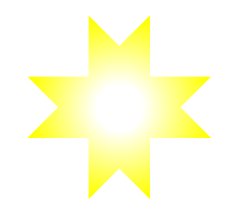
A new graphics path is created, in the shape of an eight-pointed star. This path is then applied as a clip mask, and a radial gradient is painted over the bounding box of the star. The result is a star shape that is filled with a gradient.
This sample can be improved by making the star a stencil (see Images and stencils), as in the following code:
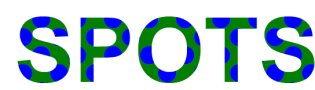
The code creates a clip mask in the shape of some text, and then plots yellow dots on a green background. Because of the clip mask, the dots and the background apply to just the area covered by the text. The result is spotted text. To emphasise the effect, the text is rendered in capitals and in a bold-face font.