Getting Started
January 2015
support@pureload.com
Getting Started
|
|
| PureLoad
5.2 January 2015 |
http://www.pureload.com support@pureload.com |
This document serves as the
introduction to PureLoad. It covers installation procedures,
important concepts and how to get started.
Please read this guide before reading any other PureLoad related document.
PureLoad
is
verified
on
the
following
operating systems:
PureLoad is written in Java and should run on any operating system that includes Java 1.7 or Java 1.8.
At least 20 MByte free disk space is required for PureLoad and
additional space for Java VM (if not already installed).
Hardware requirements regarding CPU and memory depends a lot on
the system under test, the number of threads (virtual users to
simulate), and the simulated traffic model. As a rule of thumb a
minimum of 4 GB system memory is recommended.
For more details, we suggest that you discuss this with PureLoad
Software's Support team.
PureLoad is distributed in a self-extracting format. Simply execute the installer and answer the questions about install location, etc. in the graphical user interface provided.
For details on how to execute the installer on different
operating systems, see the instructions on the web page where you
downloaded PureLoad.
When installed, the PureLoad installation directory, <install-home>, contains the following sub-directories:
There are a number of System
Properties that can be modified for PureLoad. Typically you
only need to modify the naming.host property.
In addition there are application Java VM properties to control
the max heap size of each PureLoad program (Console, Naming,
Taskspace or Manager). These are named <program-name>.vmoptions
and located in the <install-home>/bin/
directory.
For example to change the max heap size for the console edit the
file console.vmoptions and change the content to:
| -Xmx512M |
This will increase the max heap size to 512Mbyte.
Note: The -Xmx option specifies the max. heap size for the
specified process. In order to increase the max heap size for the
Worker JVM then you need to set the worker.args property in
pureload.properties.
See System
Properties for more details
When you purchase PureLoad you will receive a license file that
reflects your specific license options. The license is a text file
that must be installed in the <install-home>/license
directory.
The
name
of
the file must be pureload.license.
The license file only needs to be accessible by the machine that
hosts the PureLoad naming process. PureLoad must be restarted if
the license file is replaced.
Note: The current license information can be viewed from within
the PureLoad Console using the "About->License Info..." menu
choice. Also note that the license information seen here is the
license as defined by the naming process.
PureLoad is available different editions, but all of them
requires a license to run. For more details on differences between
the editions please see the PureLoad home
page.
The steps to uninstall PureLoad depends on the platform being
used, but you will find an application in the <install-home> directory
named PureLoad Uninstaller.
Start the application and you will be guided through the uninstall
process.
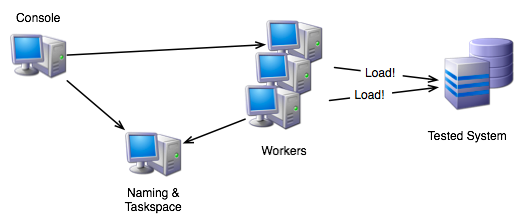
PureLoad includes support for load testing server applications in a distributed environment. This means that load can be generated from multiple hosts within a local network.
The following picture outlines the runtime architecture of PureLoad:
A test case in PureLoad is structured as Scenarios. A scenario is
defined by a series of tasks or sequences of tasks and is the unit
that are executed by workers.
A task is the smallest form of operation in PureLoad and normally
consist of a client request (for example a HTTP request), but can
also be a utility task to check a previous result or extract
information from a previous result.
Read more about Scenarios and task in the Scenario Editor
chapter.
All hardware machines that are going to generate load in a PureLoad session needs to be managed by a PureLoad Manager process. This process is responsible for all PureLoad activities on the machine. A manager can host one or several Worker processes. Typically only one worker process is needed.
Each worker process is responsible to maintain one or more Worker Threads. The worker threads are the actual executors of scenarios. There is no built-in limit in PureLoad on the number of possible workers and worker threads that can be started. It is rather the characteristics of the actual hardware and OS that limits the number of resources that can be started.
Read more about Workers and Worker Threads.The following will give you a short introduction on how to get
started and how to execute a very simple PureLoad test session,
without any server monitoring.
To start we have to start the servers and the console. One easy
way to do this for evaluation purposes or a smaller test, is to
run PureLoad in stand-alone
mode, where all servers and console is running in the same
process. See Starting
in
Stand-alone Mode for details.
You will now see the console graphical user interface:
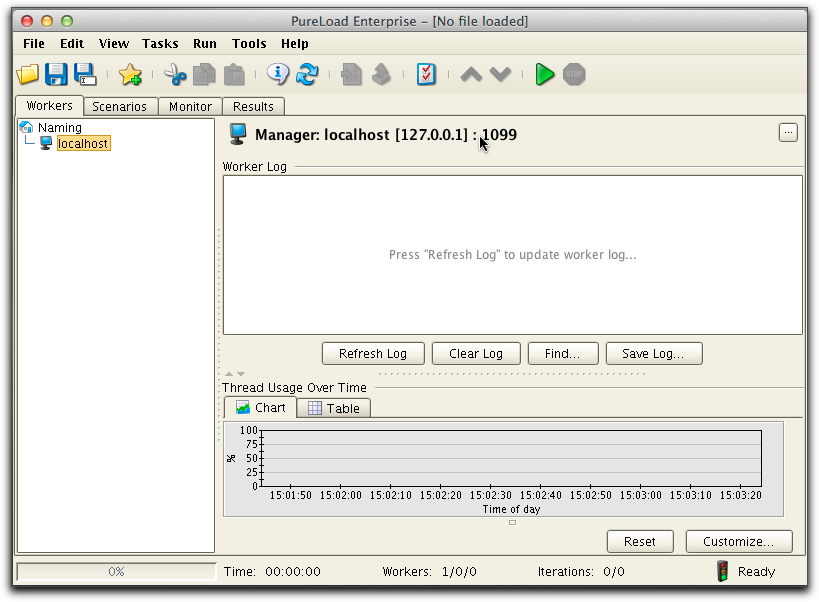
Since we are running in stand-a-lone mode we only have one worker
manager host (localhost [127.0.0.1] in this case).
The first step in a PureLoad session is to create at least one
worker for each manager process (host). You do this in the Workers
tab by selecting one or several manager nodes and after that
choose the Edit->Create
Object menu choice or the  button in the
tool bar. Specify number of workers (JVM's) and worker threads per
JVM to create. For now, only create one thread:
button in the
tool bar. Specify number of workers (JVM's) and worker threads per
JVM to create. For now, only create one thread:
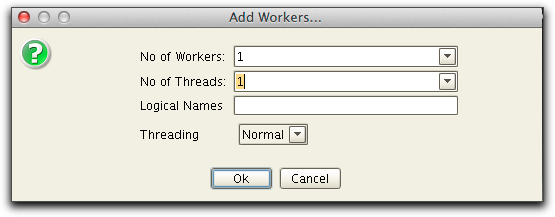
Note: The number of threads you can create might be limied by the license.
Now you will see the created worker and worker thread in the workers tree: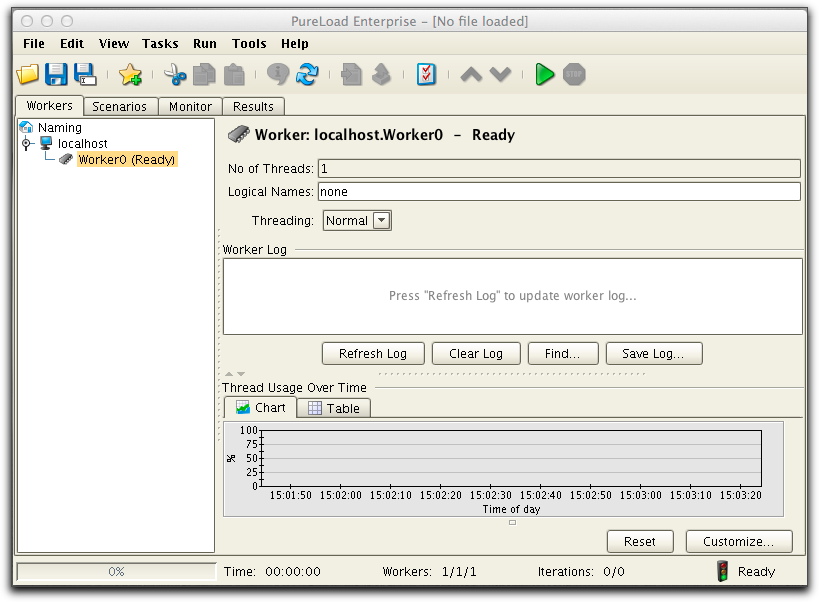
More about Workers and Worker
Threads.
Creating scenarios is the process of defining what to test and
applying the dynamic properties of the load test. This is done by
adding task sequences (optional) and tasks to a scenario object.
The scenario and task sequence objects can be seen as containers
used to organize tasks. A task normally defines a specific
operation as seen from a user or application perspective. Tasks
can also be individually parameterized (for tasks that supports
task parameters).
Here we will create a very simple scenario, using only one task
to access a web server.
Go to the Scenario Editor (i.e select the Scenarios tab), select
the root node and choose the Edit->Create
Object menu choice or the button in the
tool bar. A Scenario node will now be created:
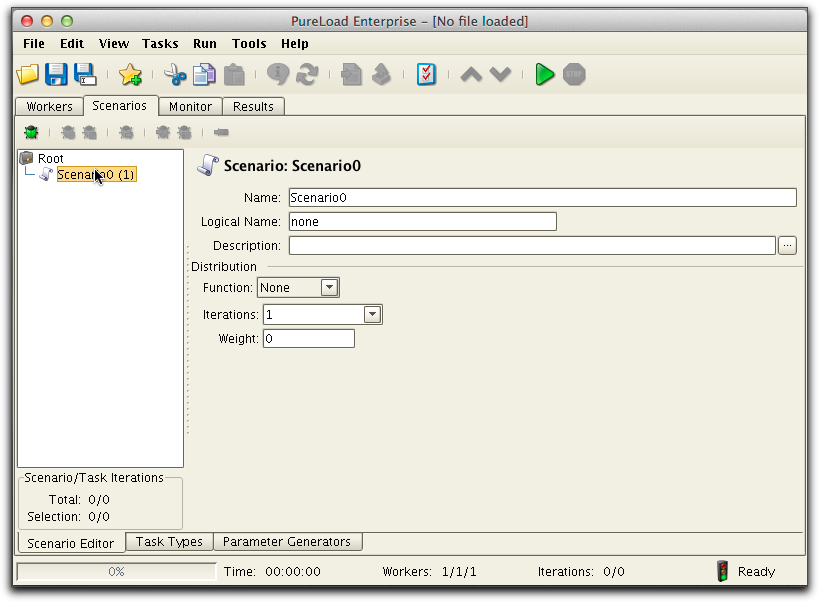
Select the scenario and repeat the operation described above. Now
you will be presented with a dialog, where to select a task type
to be added. Find the task HttpGetTask,
select it and press Add.
Now you will have a simple scenario, with only one task:
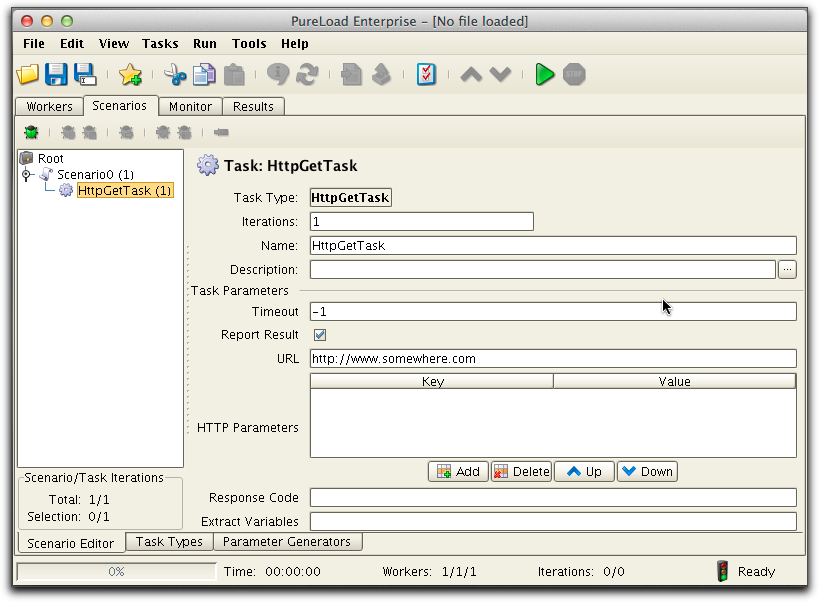
Now let us specify the URL
we want to use, instead of the default. Here we assume that there
is a web server running on the same local host we run PureLoad,
using port 8080. Also update the Response
Code parameter to make sure we get an expected
response/status code:
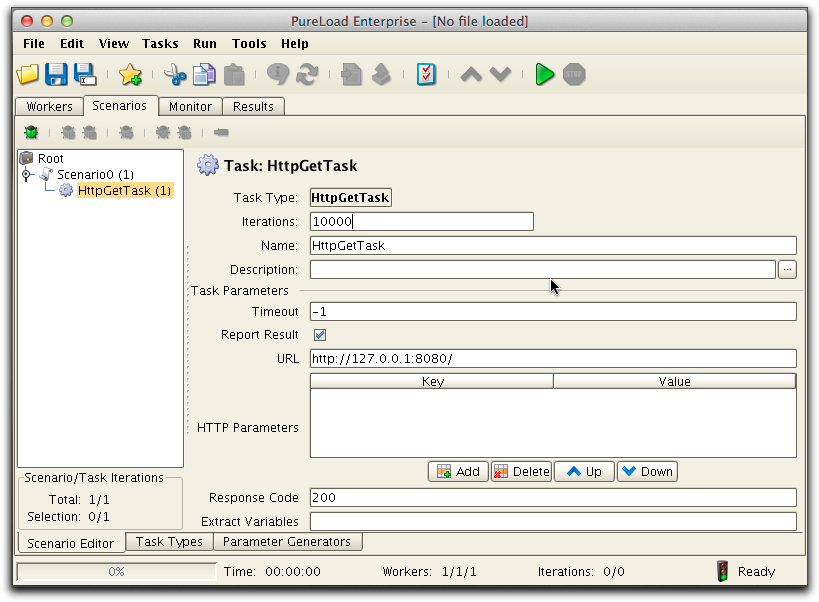
Now we have a very simple scenario, with only one task. When
executed this task will generate an HTTP request to
"http://127.0.0.1:8080/". We want to run this 10000 times so we
have also updated the number of iterations for the scenario to
10000.
Read more about scenarios and tasks in the Scenario Editor
chapter.
Also note that creating scenarios for a web application, using HTTP tasks can be tedious and time consuming. The PureLoad HTTP Recorder simplifies this process. Read more about this in Testing Web Applications.
Now we will run the execution of this scenario. We start the
execution by selecting the scenario in the tree and then start the
load session using the Run->Start
Load Test menu choice or the ![]() button in the tool
bar. An execution can only be started if there are existing worker
threads and that at least one scenario is defined and selected.
button in the tool
bar. An execution can only be started if there are existing worker
threads and that at least one scenario is defined and selected.
A confirm dialog is now displayed:
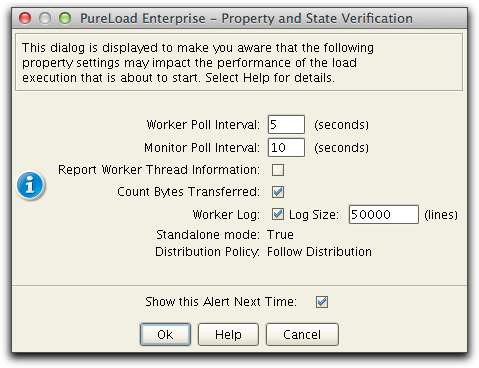
Make sure we use a short Automatic Update Interval (for now).
During a long load test you should not use a short interval, since this will affect
the load test and use more resources.
Choose Ok to start the test.
As soon as the execution is started you will see results being
displayed. Results from a load execution is periodically reported
in the Results tab:
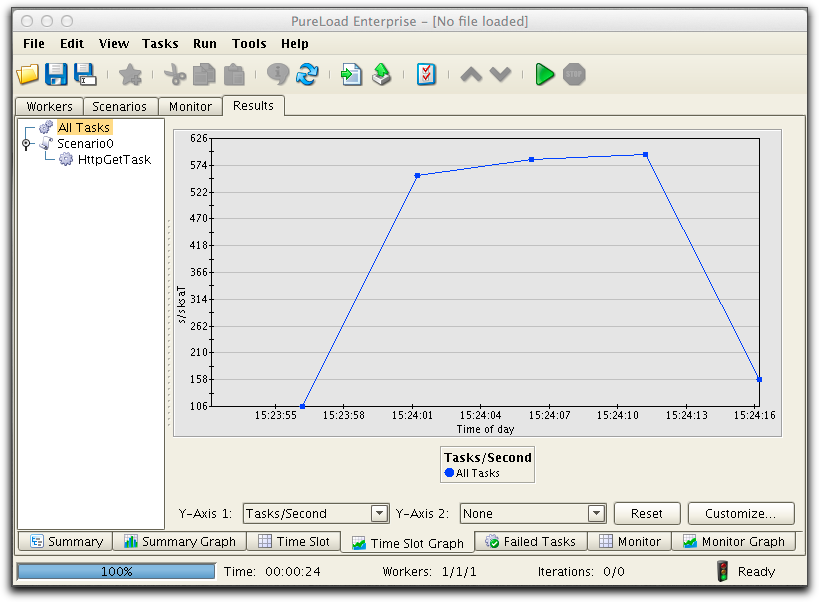
The figure above shows the Time
Slot Graph. In this example, the graph is updated every
5th second and it is the tasks per second that is plotted in the
graph.
There are several sub tabs that shows the result information in
different formats and layouts. These tabs are located at the
bottom of the Results tab.
Also note that the progress of the load test is displayed in the
status bar at the bottom.
Learn more about results in the Execution and Results chapter.